
How do I take a picture (screenshot or snapshot) of my computer screen and send it to someone?
Perhaps you want to share the way your screen looks with someone who needs your help or you need to include a view of the screen you’re seeing so that it can be enhanced or modified during development of a custom application.
Here are some simple instructions:
On a Mac OS…
- Press Command-Shift-4 on your keyboard.
- Press the space bar. Your cursor will change to a camera pointer. Move the pointer over the window you want to take a picture of.
- Click your mouse. The system will take a screenshot of the window and save it to your desktop as a file called Screen Shot DATE TIME.png.
For more options, see this article: https://support.apple.com/en-us/HT201361
On Windows …
- For Windows 7… Click the Start button, select All Programs > Accessories > Snipping Tool. For Windows 8…While on the start screen, start typing “snipping tool”, and then select it from the search results.
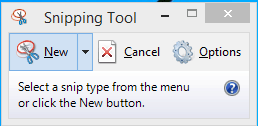
- Click on New and choose Window Snip from the dropdown menu.
- Click on the window you want to take a screenshot of. The Snipping Tool will open the screenshot in a new window.
- From the File menu, choose Save As… or press Control-S and save the picture to the Desktop.
For a more detailed explanation, see this article: http://www.wikihow.com/Take-a-Screenshot-in-Microsoft-Windows
Sharing the Screenshot
Once the snapshot is saved to your desktop, you are now able to share it. Simply drag and drop the screenshot from your desktop into a message you are typing in Mail, Outlook, or Basecamp. There is no need to place the screen shot into a Microsoft Word document first.
The LuminFire team is an elite group of software developers, engineers, and technology leaders with nearly 40 years of industry know-how. Passionate about empowering growth-focused organizations, the team is dedicated to removing technical obstacles and sharing insights to help businesses become more effective, productive, and profitable.