
I am well known in the office for being a nitpicky guy. I constantly complained about the trend towards so-called “flat” icons. What’s wrong with a little embossment to make an image look like a real button? Why not add a little color to help the user more quickly understand what the image is? A little stitching on that leather goes a long way to enhance the user experience… (Sorry, Scott Forstall, I don’t know if I’d go that far!)
I’ve relaxed my stance a little bit because with FileMaker 14. Flat (SVG) icons do have some amazing advantages over the traditional (raster based) icon design. Because SVG images are made up of vector lines, they can be resized with no loss of quality and can even have the fill color changed programatically. Today we’re going to share what we’ve learned to help you with your FileMaker icon design!
Let’s take a quick look at the new button setup in FileMaker 14:
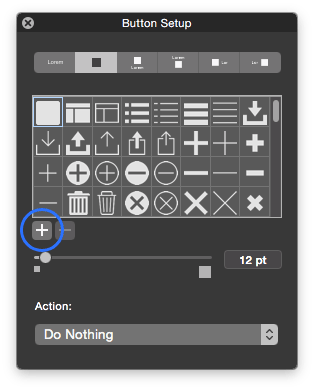
As you can see, the default icon is a rounded square when you first select a label with an icon on it. No doubt this is intended to be a placeholder icon, to be changed to something more interesting by you. You can select one of several built-in icons, or add your own. To add a custom icon, click on the + icon (circled in blue, above).
At this point you’ll need an .svg icon. flaticon.com is an excellent resource, but we’ll walk you through complete custom icon creation using Adobe Illustrator.
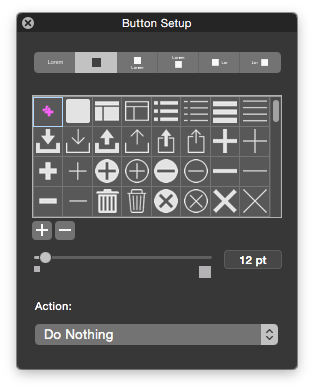
Below is a fuchsia “duplicate” icon I created. I hope it’s beauty is as breathtaking for you as it was for me. :)
![]()
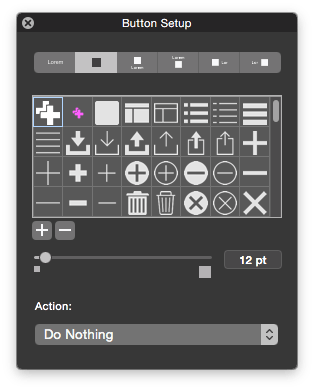
If we save it as an .svg file (I always use the “SVG Tiny 1.2” Illustrator profile) and add it to our FileMaker button, we will get something that looks like this:
Our icon appears to be smaller than it should be. This is due to the extra margins that we have all around the artwork. If the gap is too wide, you might not even see the icon because it’s so small, relative to the artboard size. In this case, the shapes are about 5 inches square on a US Letter size artboard. The simple solution is to select Object > Artboards > Fit to Artwork Bounds. This will resize the artboard exactly to fit the icon.
Another problem is the color. Although fuchsia is an amazing color, it’s probably not the best choice for most designs, and icons added in this manner will remain fuchsia no matter what you do with it in FileMaker. The trick is to add the special class=“fm_fill” tag to the .svg file for each region. But first, let’s change the fill color to white* (so it shows up nicely in Button Setup) and try again.
* You can specify any color you want; the “fm_fill” class will allow FileMaker to override the explicit color defined in the .svg. So, if you want to keep custom icons visually separate from the built-in white ones, you can keep them fuchsia. :)
Below is the SVG code after changing the color to white and sizing the artboard to fit the artwork (drag the saved .svg icon to TextEdit or your favorite text editor):
<?xml version="1.0" encoding="utf-8"?>
<!-- Generator: Adobe Illustrator 15.1.0, SVG Export Plug-In . SVG Version: 6.00 Build 0)  -->
<svg
  version="1.2"
  baseProfile="tiny"
  id="Layer_1"
  xmlns="http://www.w3.org/2000/svg"
  xmlns:xlink="http://www.w3.org/1999/xlink"
  x="0px"
  y="0px"
  width="350.383px"
  height="350.383px"
  viewBox="0 0 350.383 350.383"
  overflow="inherit"
  xml:space="preserve">
<path
  fill="#FFFFFF"
  d="M145.933,47.421h40.209V0H98.54v98.54H0v87.603h48.434v-39.699h97.5V47.421z M251.843,164.24V65.7H164.24v98.541H65.7v87.602h98.541v98.541h87.603v-98.541h98.54V164.24H251.843z"/>
</svg>
Now all we have to do is add the class=“fm_fill” tag to each region defined (in our example there is only one). I usually add it immediately after the #FFFFFF fill tag. Here is the final result:
<?xml version="1.0" encoding="utf-8"?>
<!-- Generator: Adobe Illustrator 15.1.0, SVG Export Plug-In . SVG Version: 6.00 Build 0)  -->
<svg
  version="1.2"
  baseProfile="tiny"
  id="Layer_1"
  xmlns="http://www.w3.org/2000/svg"
  xmlns:xlink="http://www.w3.org/1999/xlink"
  x="0px"
  y="0px"
  width="350.383px"
  height="350.383px"
  viewBox="0 0 350.383 350.383"
  overflow="inherit"
  xml:space="preserve">
<path
  fill="#FFFFFF"
  class="fm_fill"
  d="M145.933,47.421h40.209V0H98.54v98.54H0v87.603h48.434v-39.699h97.5V47.421z M251.843,164.24V65.7H164.24v98.541H65.7v87.602h98.541v98.541h87.603v-98.541h98.54V164.24H251.843z"/>
</svg>
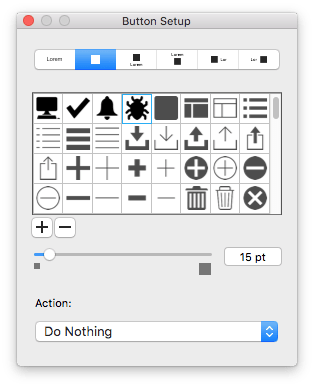
Save the changes, add to FileMaker’s Button Setup dialog again, and this is what we’ll get:
Your icon is now a fully scalable, re-colorable image that you can use on any button or button bar! You can change the icon color for each button object, or as part of the style (choose different shades for Hover or Pressed states). You can even change the color using Conditional Formatting.
Subnotes:
- The official FileMaker documentation states: “FileMaker supports only the ‘nonzero’ fill rule, the SVG standard’s default fill rule.” Further on in the document, it states: “To apply color to an SVG element, ensure that the fill color is not explicitly set on the element in the SVG image file.”
While this method does seem to work, we found that the icons do not show up very clearly in the Button Setup preview area. Setting both fill color (fill=“#FFFFFF”) and the special class (class=“fm_fill”) on each region, as outlined above, seems to work the best.See note #4. - Daniel Wood from Digital Fusion states: “Note also that icons cannot be added to a file while that file is hosted, it must be local for icons to be able to be saved with a file for future use.” We’ve found this not to be true. We’ve added several custom icons to a hosted file and they display properly on other clients, and after several reconnections.
Adding icons with a white fill color (on OS X) seems to cause the icon previews to display strangely on Windows. If you do a lot of cross-platform development, you may want to choose a gray fill (e.g. #99999 or #666666).See note #4.- Update 2018-12-06: As of FileMaker 17.0.3, icons with no “fill” class now show up properly in the Button Setup preview:

Tim Cimbura – CEO, CFO and Solution Engineer
Tim is an expert in creating custom business solutions that make businesses more effective, productive, and profitable. He specializes in rapid application development with Claris FileMaker, Laravel, and WordPress. He also knows Apple macOS technology inside and out.