
PHP Code Sniffer (PHPCS) is a code inspector that can help enforce coding standards by highlighting problems. We like it because using it is an easy way to make sure you’re using best practices while you’re editing, or before you commit your code. Because we work with WordPress, we use the the official WordPress coding standards rules for PHP Code Sniffer. Also part of the PHPCS project is PHPCBF (PHP Code Beautifier and Fixer) which can automatically fix minor formatting issues with your code to better help it conform to a particular coding standard.
Installing PHPCS
Using Homebrew is an easy way to install open-source development tools on your Mac. Visit their site for their super-easy installation procedure. Then to add PHPCS via Homebrew, open the Terminal app and run the following commands:
$ brew install homebrew/php/php-code-sniffer
Pro-tip: Homebrew’s installation procedures often change as their software evolves. You may find it best to run
brew search php-code-snifferto provide some hints as to whether or not the installation command above is current and will work.
Then I cloned the repository of WordPress coding standards rules for Code Sniffer from github into my ~/src directory:
$ cd ~/src
$ git clone https://github.com/WordPress-Coding-Standards/WordPress-Coding-Standards.git
Add WordPress to the PHPCS configuration by running:
$ phpcs --config-set installed_paths ~/src/WordPress-Coding-Standards
Verify that it was installed by running:
$ phpcs -i
The installed coding standards are MySource, PEAR, PHPCS, PSR1, PSR2, Squiz, Zend,
WordPress, WordPress-Core, WordPress-Docs, WordPress-Extra and WordPress-VIP
Atom
Simply follow the Homebrew guide above to install PHPCS along with the WordPress specific code sniffer on your machine. Once that’s done all you’ll need to do is install the linter-phpcs package within atom.
If you’re already running linters within atom you can ignore this first step, but if not….
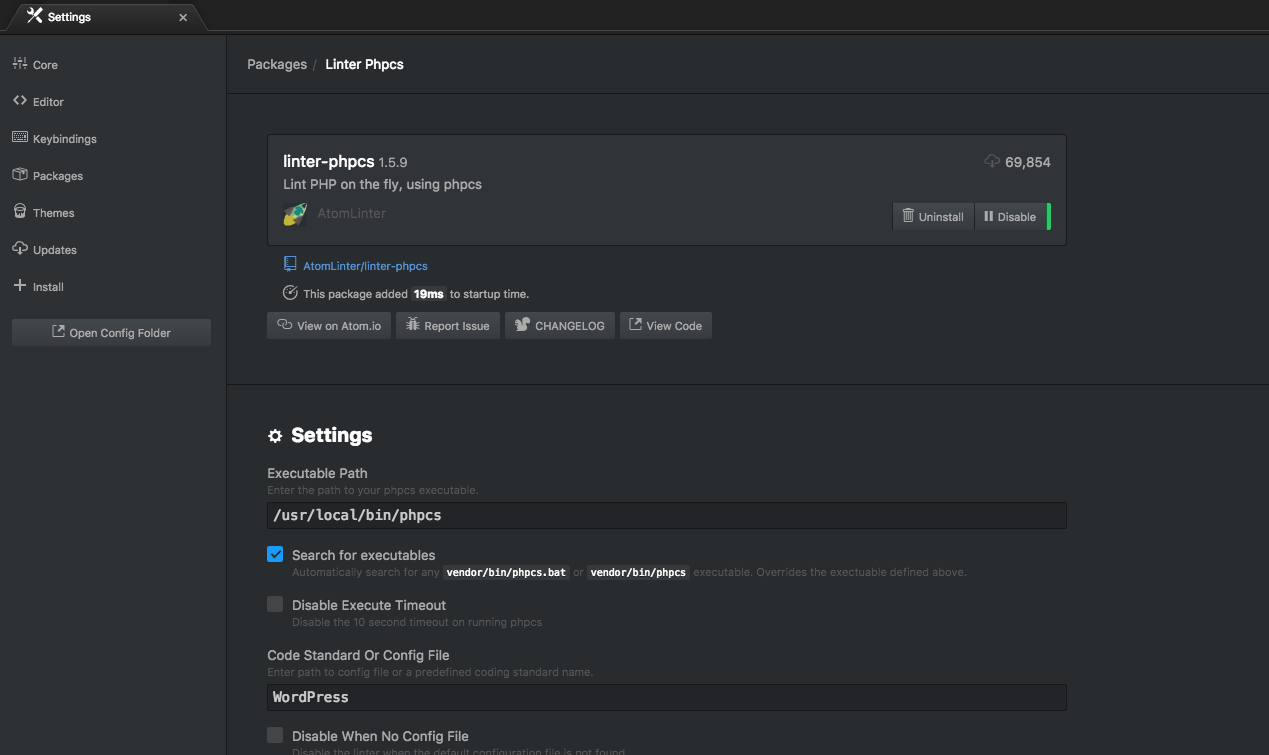
In the top menu click on ‘Packages’ then ‘Settings View’ then just do a quick search for ‘linter’ and you’ll find a packer called ‘Linter’ A Base Linter with Cow Powers. Go ahead and install that.
Next, using the same method you’ll want to grab the PHPCS specific linter, it’s called linter-phpcs. Go ahead and install that one as well. Once it’s installed you’ll want to set the executable path of PHPCS and add in the config for the WordPress coding standards as well.
Emacs
If you’re an emacs person and want to integrate on-the-fly code sniffing in your editor, I recommend using an emacs package called flycheck. You can install flycheck by following the installation instructions on their site. Here’s a run-down:
To your ~/.emacs file add:
;; MELPA
(require 'package)
(add-to-list 'package-archives
'("MELPA Stable" . "https://stable.melpa.org/packages/") t)
(package-initialize)
Then fire up emacs and run:
M-x package-install RET flycheck
In order for the PHPCS checker to work, you’ll also want to install php-mode using MELPA the same way you installed flycheck:
M-x package-install RET php-mode
To set your PHPCS standard ruleset and to turn flycheck on all the time, also add these to your ~/.emacs file:
(custom-set-variables
'(flycheck-phpcs-standard "WordPress")
)

(add-hook 'after-init-hook #'global-flycheck-mode)
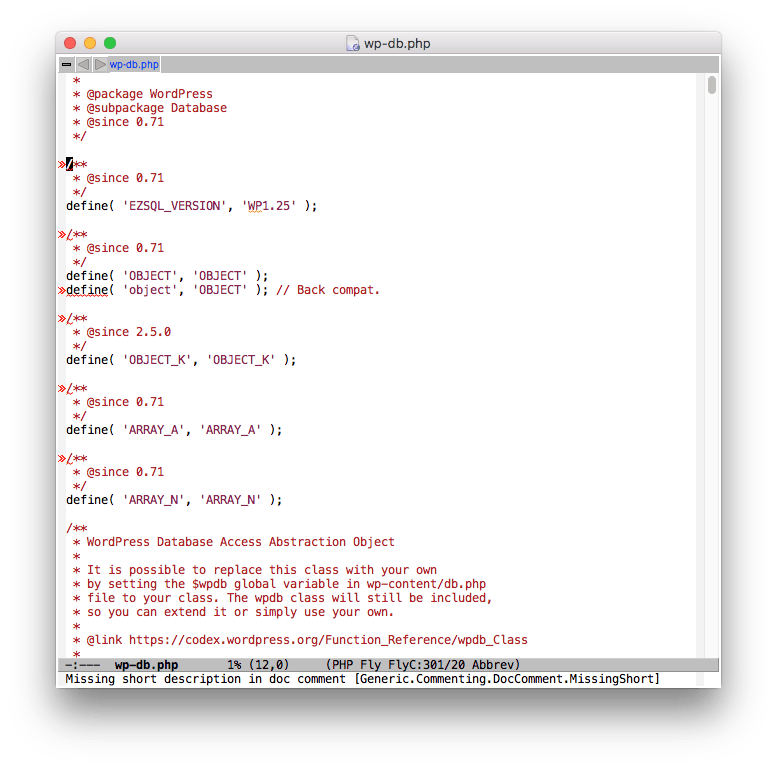
Now when you edit files, flycheck will underline issues in the editor based on the PHPCS rules. When your cursor is on the underlined area, flycheck will print the issue message in the mini-buffer at the bottom:
Vim
Vim users may want to consider using the vim-phpqa plugin. The plugin can be installed with Vundle, or it can be installed manually if you prefer.
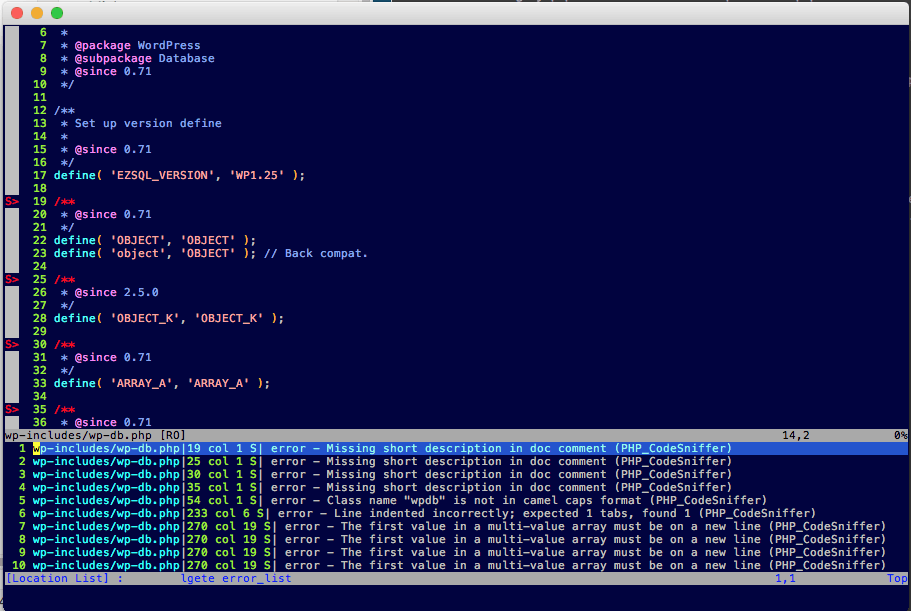
I added the following lines to my ~/.vimrc file:
Bundle 'joonty/vim-phpqa.git'
let g:phpqa_codesniffer_args = "--standard=WordPress"
let g:phpqa_messdetector_autorun = 0
let g:phpqa_codesniffer_autorun = 0
The first line is for Vundle. The second line sets tells PHPCS to use the WordPress standards by default. The third and fourth lines tell the vim-phpqa plugin to not auto-run on save.
Why not run PHPCS on save?
First of all, PHPCS is kind of slow. It took my computer nearly 8 seconds to run PHPCS against wp-db.php, and vim is unresponsive until it finishes. A few lost code experiences many years ago trained my fingers to reflexively save every few seconds. I can’t have an 8 second process running every 4 seconds.
Second, most files don’t pass PHPCS. I only strive for full PHPCS compliance for files that I will be releasing to the world. If I inherit a project or plugin, or if I copy some code from github, I’m not going to mess around with working code just to comply with the WordPress coding standard. Since I’m not striving for full compliance the extra noise in the editor is just a distraction.
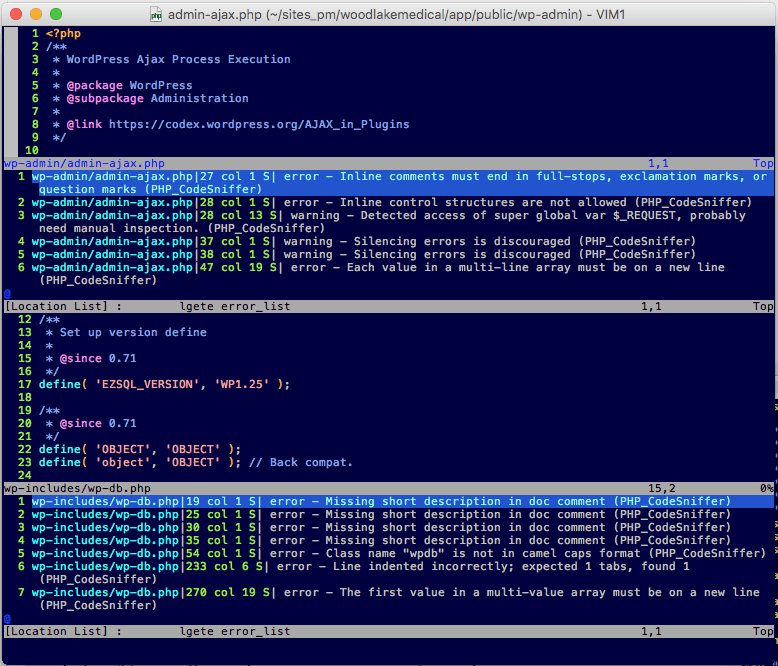
Third, vim-phpqa doesn’t play well with split screen editing, which I use extensively. It works correctly, but the interface gets cluttered very quickly.
Running PHPCS Outside Of Your Editor
To run PHPCS manually you will want to run
$ phpcs --standard=WordPress ./wp-includes/wp-db.php
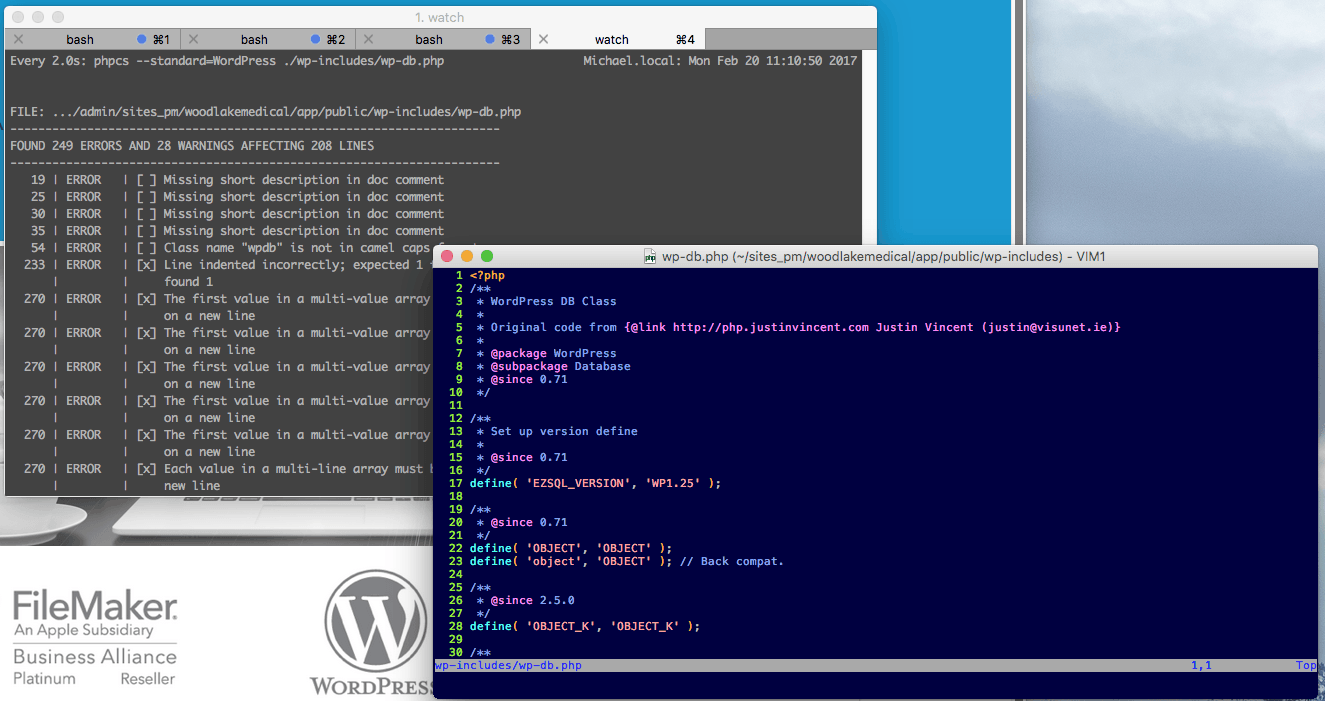
That works well but if you’re editing, saving, re-running, and you want to avoid the editor locking up after each save, you can do what I do: Use the watch command.
$ watch 'phpcs --standard=WordPress ./wp-includes/wp-db.php'
The watch command will try to run PHPCS every 2 seconds (customizable). The output is in a separate window so vim doesn’t get cluttered, and vim doesn’t lock up while PHPCS is running, so you can just keep fixing errors.

Nick Ciske – CTO, CISO - Chief Technology Office and Solution Engineer
Nick has a degree in Multimedia Design and over 25 years of experience working in web development and digital media. Nick specializes in architecting amazing and brilliant application solutions.